
Tired of those abrupt joins between different floor coverings? Transforming them into polished, flowing details not only makes your home safer but also ups its style game. Whether you're connecting wood to tile, or carpet to laminate, those imperfect edges can be a trip hazard and just look messy. This guide is packed with straightforward explanations, installation tips, and the practical benefits for every kind of transition, so you and your DIY spirit can achieve beautifully fluid floors. You'll discover:
- The must-knows about transition strips, thresholds, and expansion gaps.
- Easy-to-use profiles, from T-molding to ramp sections, and how they stack up.
- Step-by-step instructions for joining wood to tile, carpet to laminate, and vinyl to wood.
- The essential tools, adhesives, levelling compounds, and safety precautions you'll need.
- Creative border ideas, eco-friendly options, and expert advice for door thresholds.
- Best practices for handling different floor heights and essential expansion allowances.
What Exactly Are Flooring Transitions and Why Do They Matter?
Flooring transitions are the elegant bridges between different floor coverings, expertly managing height differences, securing edges, and discreetly hiding expansion gaps to keep everything looking cohesive and structurally sound.
What is a Flooring Transition and What's Its Job?
A flooring transition is essentially a trim piece designed to join two distinct floor surfaces. Its main job is to gracefully handle any height differences between them, stabilise the edges, and prevent stress on the materials. By creating a smooth, stable buffer at these junctions, transitions help prevent chipping and eliminate those unwelcome tripping hazards, ensuring a safer and more durable floor.
How Do Transition Strips and Thresholds Actually Work?
Transition strips are designed to clip or stick neatly over the edges of adjacent flooring, effectively spreading the pressure from foot traffic and hiding any raw cuts. Thresholds, on the other hand, are typically used at doorways and entry points. They span the opening with a raised or flat profile to clearly define spaces, block drafts, and hide expansion gaps, contributing to both the functionality and the overall design of your space.
Why Are Expansion Gaps So Crucial in Flooring Transitions?
Expansion gaps are absolutely vital for hard flooring materials like laminate, wood, and tile. They provide the necessary space for these materials to naturally expand and contract as humidity and temperature levels fluctuate. Without these essential gaps, your flooring could buckle, warp, or even crack. Transition trims play a key role in protecting these installations by neatly covering these vital allowances.
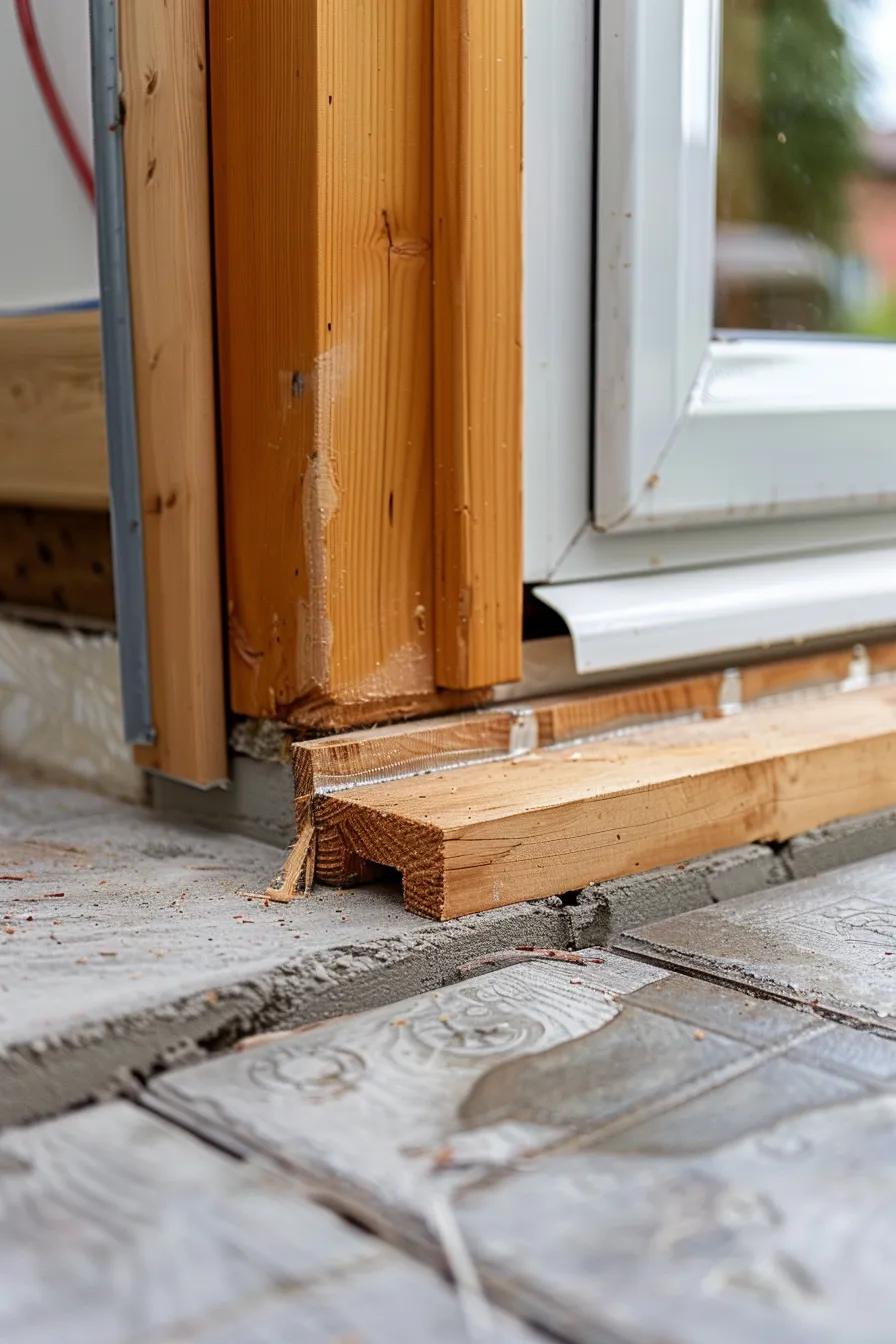
Why Expansion Gaps Are a Must for Laminate Flooring
Expansion gaps are fundamental to the long-term well-being of your flooring. They allow materials such as laminate and wood to expand and contract naturally with changes in temperature and humidity. If you skip these crucial gaps, you risk serious damage, including buckling, warping, or lifting of your floorboards.
This insight confirms our explanation of why expansion gaps are indispensable for flooring transitions, helping to maintain structural soundness and prevent material strain.
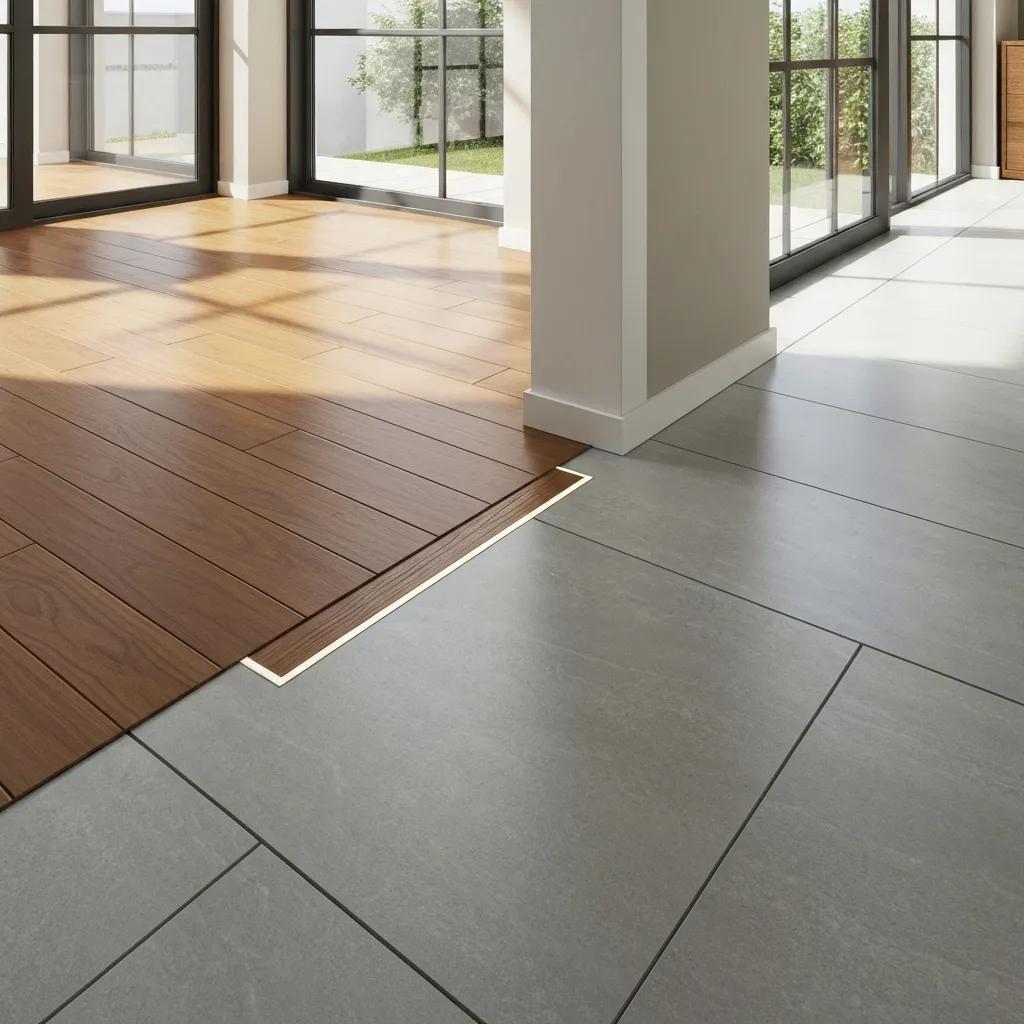
How Do Flooring Transitions Boost Both Safety and Style?
By smoothing out abrupt changes in floor level and hiding exposed edges, transitions significantly reduce the risk of trips and falls, while also delivering a beautifully finished junction between different floor types. Visually, they create a deliberate design element that unifies your materials, reinforcing your chosen style and enhancing the overall interior aesthetic.
The Risk of Falls When Navigating Different Flooring Materials
Research highlights that shifts in flooring surfaces can notably affect how people walk, particularly older adults, increasing the likelihood of slips and trips. This underscores the critical importance of smooth, well-managed flooring transitions for enhancing safety, especially for those more vulnerable.
This study directly supports our point about how flooring transitions improve safety by minimising trip hazards and smoothing out level changes, a key consideration for fall prevention.
Visually, they create a deliberate zone that unifies materials, reinforcing style continuity and elevating interior design.
Which Flooring Transition Strips Are Best Suited for Your DIY Projects?

Getting to know the different strip profiles will help you pick the perfect solution for your specific needs, whether it's dealing with height differences, different surface materials, or particular installation challenges.
What is T-Molding and When's the Right Time to Use It?
T-molding is a versatile, T-shaped strip designed for joining floors that are at the same height. It slots neatly into a channel created between the two floor surfaces, protecting the edges and providing a clean visual break. It's the ideal choice for connecting two level surfaces, such as laminate to vinyl.
How Do Reducer Strips Help with Uneven Floor Heights?
Reducer strips are ingeniously designed to taper from a higher floor surface down to a lower one, making foot traffic much smoother and blending height variations of up to 12 mm. Their sloped edge creates a gradual transition, preventing abrupt drop-offs and significantly improving accessibility.
When Do You Need Thresholds and End Caps?
Thresholds are robust profiles typically used at doorways and entry points. They clearly define the threshold while also accommodating expansion. End caps, on the other hand, are used to finish off exposed edges, such as at the end of a carpet run or a plank flooring installation, providing a neat and complete look.
What Are Flexible and Ramp Profiles for Curved or Sloped Transitions?
Flexible profiles are brilliant for following curved edges, making them perfect for round alcoves or bay windows. Ramp profiles, meanwhile, offer a gentle incline for sloped joins, smoothly bridging transitions between floors of varying heights without the need for complex custom cutting.
How to Choose Between Aluminium, Wood, and PVC Transition Strips?
Here’s a handy comparison of the most common materials for DIY transition strips:
| Material | Durability | Aesthetic Match | Ease of Installation |
|---|---|---|---|
| Aluminium | Resilient against high traffic | Modern, sleek metallic finish | Requires pre-drilling and screws |
| Wood | Offers natural warmth and charm | Complements hardwood flooring beautifully | Can be installed with adhesive or nails |
| PVC | Resistant to moisture | Available in a wide range of colours | Simple snap-in or adhesive application |
How Do You Tackle Transitions Between Different Flooring Types Yourself?
Switching between different materials requires specific steps that respect the unique installation needs and expansion requirements of each surface.
What Are the Steps to Transition Wood Flooring to Tile?
Follow this clear process for a flawless wood-to-tile join:
- Carefully remove any existing trim and cut your wood planks flush at the join line.
- Install your tile underlay, ensuring you leave a 6 mm gap at the edge where it meets the wood.
- Position a reducer or T-molding strip within the gap, securing it with adhesive.
- Fasten the strip firmly using screws or nails through pre-drilled holes.
- Seal the edges with flexible silicone to prevent any moisture from getting in.
Adhering to these steps will ensure a stable bond and a visually pleasing flow between your floors.
How to Transition Carpet to Laminate Flooring Smoothly?
When bridging the gap between soft carpet and hard laminate:
- Trim the carpet pile neatly flush with the edge and install a carpet gripper strip along the boundary.
- Lay your laminate underlay, stopping it right at the gripper strip.
- Snap a reducer strip into place over the junction, ensuring it's centred for a clean finish.
- Press down firmly to engage the snap-in mechanism and stabilise both flooring surfaces.
This method effectively hides rough cuts and prevents fraying, creating a durable and attractive interface.
What Techniques Create Seamless Vinyl Plank to Wood Floor Transitions?
For those seamless vinyl to hardwood joins:
- Make sure both flooring surfaces have an underlay of similar thickness.
- Use a slim T-molding that matches the width of your planks.
- Apply adhesive to the underside of the molding and press it firmly into position.
- Achieve a harmonious look by selecting a molding finish that complements the wood grain or vinyl tones.
Precise cuts and thoughtful colour coordination will result in a seam that's almost invisible.
How to Manage Height Differences When Joining Different Floors?
When your floor heights don't quite match, reducer strips or ramp profiles are your best friends, gradually bridging these gaps for a safe and smooth transition. They're ideal for differences exceeding 10 mm:
- Accurately measure the maximum height difference.
- Choose a reducer profile specifically rated for that particular difference.
- If necessary, shim the lower floor using plywood or a suitable subfloor compound.
- Secure the chosen strip firmly with adhesive or screws for lasting stability.
By combining shims or levelling compounds with the right profiles, you'll achieve both safety and a beautifully polished finish.
What Tools and Materials Are Essential for DIY Flooring Transitions?
For successful installations, you'll need precise measuring, clean cuts, and the right adhesives to securely fix your transition trims.
Which Tools Are Required for Measuring, Cutting, and Installing Transition Strips?
Before you begin, make sure you have these essential tools ready:
- A reliable tape measure for accurate height and width checks.
- A mitre saw or hacksaw for making precise cuts to your strips.
- A spirit level to ensure your joins are perfectly flat.
- A drill with the appropriate bits for installing screw-fixed profiles.
These tools will help you achieve exact dimensions and clean edges, laying the groundwork for secure and professional-looking trims.
What Adhesives and Fasteners Work Best for Different Transition Types?
| Strip Type | Recommended Adhesive | Fastener |
|---|---|---|
| Snap-in PVC | Polyurethane construction adhesive | None needed (relies on snap-in mechanism) |
| Wood or MDF | Flooring adhesive cartridge | Brad nails or screws |
| Aluminium | Epoxy or PL-grade adhesive | Countersunk screws |
How to Use Floor Levelling Compounds for Uneven Subfloors?
Pourable levelling compounds are perfect for filling dips and creating a smooth surface:
- Thoroughly clean your subfloor, removing all dust and debris.
- Apply a primer to concrete or timber surfaces, following the manufacturer's instructions.
- Mix the compound to a smooth, fluid consistency.
- Pour or trowel the compound into low areas, using a spiked roller to smooth it out and remove air bubbles.
- Allow the compound to cure completely before fitting your transition strips or laying flooring.
Proper levelling ensures your transition strips sit perfectly flush and secure, preventing any future movement or issues.
What Safety Tips Should DIYers Follow During Installation?
Always prioritise your safety by:
- Wearing safety glasses whenever you're cutting strips.
- Using gloves when handling adhesives and compounds.
- Ensuring good ventilation if you're using solvent-based adhesives.
- Keeping your work area tidy to avoid tripping over off-cuts.
Following these safety practices will minimise the risk of injury and help maintain the quality of your work from start to finish.
How Can You Solve Uneven Floor Height Transitions in DIY Projects?
Tackling height mismatches often requires a smart combination of the right profiles and adjustments to the subfloor for transitions that are both durable and safe.
What Are the Best Reducer Strips for Height Differences?
Reducer strips designed for differences ranging from 7–26 mm offer incredibly versatile solutions. Profiles with snap-in bases make installation a breeze, while options in solid oak or aluminium provide extra durability for areas with heavy foot traffic.
How to Apply Self-Levelling Compounds Correctly?
Follow these steps for a perfect application:
- Prepare and prime your subfloor according to the product instructions.
- Mix the compound thoroughly to ensure there are no lumps.
- Pour the mixture into any depressions and spread it evenly with a trowel.
- Use a spiked roller to help remove any trapped air pockets.
- Allow it to set completely – typically around 24 hours – before proceeding.
A well-applied levelling compound provides a perfectly uniform base for your transition strips, preventing any unwanted shifting.
When Should You Use Shims or Subfloor Adjustments?
Shims or thin plywood underlays are excellent for minor height differences (under 5 mm). By using these calibrated spacers beneath your strips, you can achieve instant level correction without needing excessive amounts of levelling compound.
How to Ensure Durable and Safe Transitions on Uneven Floors?
By combining the correct profiles, secure fasteners, and thorough subfloor preparation – and using high-quality materials from Stories Flooring – you can create transitions that stay put, resist daily wear, and maintain their edge integrity beautifully.
What Creative and Decorative Ideas Enhance Flooring Transitions?
Moving beyond standard trims, decorative borders and unique patterns can transform your transitions into striking design features.
How to Use Mosaic and Patterned Tiles as Transition Borders?
Installing a narrow band of mosaic tiles between wood and tile can create a stunning decorative frame:
- Lay a thin, even bed of tile adhesive in the gap.
- Press your mosaic tiles into the adhesive, carefully aligning any patterns.
- Grout the tiles and seal the edges to seamlessly blend with your surrounding flooring.
This approach adds an artisanal touch, beautifully merging two different floor types.
What Are Artistic and Irregular Transition Designs?
For a truly unique look, consider custom transition shapes like wavy or zigzag profiles, often achieved using flexible wood or metal strips. CNC-cut designs can even trace organic curves, turning your floor joins into captivating focal points.
How Can Header Boards and Contrasting Strips Add Visual Interest?
A contrasting header board – perhaps a slim hardwood rail – can elegantly define spaces like hallways. Alternatively, bold-coloured PVC or metal strips can create striking graphic lines that add a modern edge to open-plan areas.
How to Incorporate Sustainable and Eco-Friendly Transition Materials?
For the eco-conscious home, options like bamboo reducer strips, recycled rubber ramp profiles, and cork end caps are fantastic choices. Here’s a quick look at their benefits:
| Eco Material | Composition | Benefit |
|---|---|---|
| Bamboo | Made from fast-growing grass | Offers strength comparable to hardwood |
| Recycled Rubber | Crafted from post-consumer rubber | Provides excellent shock absorption and slip resistance |
| Cork | Sustainably harvested tree bark | Naturally flexible and offers good insulation |
How Do You Install Door Thresholds for Interior and Exterior Floors?
Properly installed thresholds not only define room boundaries but also significantly improve insulation and prevent unwanted moisture from entering.
What Types of Door Thresholds Are Available and Their Uses?
You'll commonly find these types of thresholds:
- Flat thresholds: Ideal for standard interior room transitions.
- Angled thresholds: Perfect for bridging slight differences in floor height.
- Weather-resistant thresholds: Featuring rubber seals, these are designed for external doors to combat the elements.
How to Install Wooden, Aluminium, and Vinyl Thresholds?
Follow these general installation steps:
- Measure and cut the threshold precisely to fit the width of your doorway.
- Perform a dry fit to ensure perfect alignment before fixing.
- Drill pilot holes through the pre-drilled slots in the threshold.
- Apply sealant underneath the threshold and then screw it down securely.
- Fit any end caps and ensure seals are compressed correctly where needed.
Adhering to material-specific instructions will guarantee stable, weather-proof joins.
How Do Thresholds Help with Draught Exclusion and Insulation?
Thresholds work by compressing weather strips against the bottom of your doors, effectively blocking cold air from entering and reducing heat loss. They also seal any gaps beneath doors, contributing to better energy efficiency and a more comfortable living environment.
What Weather Stripping Options Complement Threshold Installation?
Enhance your threshold installation with these weather stripping options:
- Foam-backed vinyl strips: Simple and effective for basic draught control.
- Silicone bulb seals: Ideal for heavier exterior doors requiring a robust seal.
- Brush seals: A great solution for sliding doors to prevent draughts.
Choosing the right seal will optimise your home's insulation and prevent moisture ingress.
What Are the Best Practices for Managing Expansion Gaps in Mixed Flooring?
Effectively managing expansion gaps is key to protecting your flooring installations from stress and preventing unsightly deformation over time.
Why Are Expansion Gaps Necessary Between Different Floor Types?
Different flooring materials expand and contract at varying rates. For instance, laminate might swell by up to 8 mm along its length, while tile remains much more stable. Expansion gaps provide the necessary room for these movements, preventing buckling or cracking.
How to Choose Transition Strips That Accommodate Expansion and Contraction?
Opt for trims that feature flexible anchor bases and head profiles that can move independently of the fasteners. Snap-in or clip-on strips are excellent choices as they allow the flooring to move naturally underneath without affecting the visible trim.
What Are Common Mistakes to Avoid with Expansion Gaps?
Be sure to avoid these common pitfalls:
- Never fill expansion gaps completely with adhesive or grout.
- Avoid trimming your flooring boards too tightly against walls.
- Steer clear of rigid profiles that could restrict the natural movement of your flooring materials.
By sidestepping these errors, you'll significantly extend the lifespan and maintain the appearance of your flooring.
How to Maintain Expansion Gaps for Long-Term Flooring Health?
Make it a habit to inspect your floor junctions annually. Keep the gaps clear of debris and reapply flexible sealant if it starts to harden. Regular checks ensure your transitions continue to function effectively and your floors can 'breathe' properly.
Where Can You Find High-Quality and Affordable Flooring Transition Products in the UK?
At Stories Flooring, we offer a carefully selected range of transition strips and compounds, all designed to help you achieve DIY success while balancing quality, style, and excellent value.
What Transition Strips Does Stories Flooring Offer for DIY Projects?
Our extensive collection includes everything from T-molding and reducer strips to ramp profiles and thresholds. We stock a variety of materials, including aluminium, oak, PVC, and eco-friendly options, with each product engineered for reliable performance and straightforward home installation.
How to Select the Best Flooring Transition Strips for Your Project?
Consider these key factors when making your choice:
- Accurately measure the height difference between your floors.
- Ensure material compatibility with your adjacent flooring types.
- Assess the expected traffic levels and potential moisture exposure.
- Decide on the desired visual finish and colour match.
These criteria will guide you to the perfect strip profile and material for your specific needs.
What Are Customer Success Stories Using Stories Flooring Products?
Countless homeowners across the UK have successfully revitalised their spaces, from kitchens and hallways to expansive open-plan living areas, using Stories Flooring's transition trims. One delighted customer shared how they achieved a flawless oak-to-tile join that stands up beautifully to daily wear in their busy family home.
How to Get Expert Advice and Support from Stories Flooring?
For personalised guidance tailored to your project, our dedicated team at Stories Flooring is here to help. We offer product recommendations and installation tips via email and phone support. Our expert assistance ensures your transitions will flow seamlessly from the initial planning stages right through to completion.
Achieving smooth, secure, and stylish flooring transitions is entirely within your reach when you combine clear DIY guidance with top-quality products. With the right profiles, thorough preparation, and expert support, every junction in your home can become a refined design feature, rather than an overlooked detail.


