The Invisible Killer of Wood Floors — Humidity

Humidity is the quiet, invisible force that gradually changes how wood behaves — producing cupping, crowning, gapping and, in the worst cases, buckling. This guide explains why wood is hygroscopic, how equilibrium moisture content (EMC) drives dimensional change, and what UK homeowners can do to keep floors stable for years. Read on for clear humidity targets, simple monitoring and maintenance routines, installation and acclimation best practice, guidance on barriers and devices, and plain rules on when to DIY and when to call a pro. We map the science directly to practical steps: start with how moisture moves through boards, move into prevention and installation controls, then finish with detection, repair and species/underfloor-heating advice.
How does humidity affect wood floors? Understanding expansion and contraction
Wood is hygroscopic — it soaks up and releases water vapour until its moisture content balances with the air. That movement causes the most change across the grain (width) and smaller change along the grain (length). Over repeated cycles the boards change width and thickness, placing stress on joints and finishes and creating cupping, crowning, gapping or finish failure. Knowing this process lets you target prevention: controlling indoor relative humidity (RH) keeps movement within safe limits so floors stay flat and seams stay tight. It also helps you choose the right species and construction (solid versus engineered), because different build types tolerate RH swings differently — we’ll cover that next.
What does hygroscopic mean for wood and your floor?
Hygroscopicity means wood fibres attract water vapour from the surrounding air until the timber’s internal moisture matches the ambient equilibrium moisture content (EMC). When EMC rises the cell walls swell across the grain; when it falls they shrink. These reversible dimensional shifts create stresses at glue lines, tongues-and-grooves and finishes. Practically speaking, a 2–3% change in moisture content can visibly alter plank widths in common species such as oak, and the seasonal RH swings we see in the UK make monitoring essential to prevent cumulative damage. Using a hygrometer and a moisture meter helps you predict movement and decide whether to humidify, dehumidify or add extra vapour control.
Put simply: the moisture inside wood follows the surrounding air’s relative humidity, and that relationship drives the floor’s dimensions.
Wood and moisture — a concise summary
Wood is a porous, hygroscopic material that holds water both within cell walls and in larger pore spaces. Moisture moves through wood in different forms — bound in the cell wall, as liquid in pores, and as vapour — and the wood’s moisture content (water mass relative to dry mass) varies with temperature and relative humidity. Sorption isotherms show how EMC changes with RH at a constant temperature. Below about 97–98% RH, moisture is mainly absorbed into the cell walls; above that, capillary condensation in larger voids becomes significant. The equilibrium EMC also depends on the wood’s moisture history (sorption hysteresis). Mathematical models exist to describe these processes, but they only approximate the experimental behaviour of real timber.
— Wood and moisture, E.E. Thybring, 2023
Which types of flooring damage come from humidity?
Humidity-related damage follows recognisable patterns: cupping (boards arching with higher moisture at the underside), crowning (a raised middle after sanding damp boards), gapping (narrow seams when timber shrinks), buckling (severe uplift from trapped moisture and no room to expand) and finish problems (blisters or peeling). Typical causes vary — cupping often points to subfloor moisture, crowning to sanding before the board had dried, gaps to low RH, and buckling to restricted expansion space plus high moisture. Early action usually means stabilising RH and addressing immediate water sources; persistent or structural issues require diagnostic testing and professional remediation, which we outline later.
What are the ideal humidity levels to protect wood floors?
Keeping indoor relative humidity (RH) within recommended bands keeps timber close to its EMC and limits damaging movement. For most solid hardwood and engineered floors, aim for roughly 35–55% RH; that band corresponds to EMC values that usually hold wood’s moisture content near typical UK norms (around 8–11% depending on species and season). Keeping temperature steady as well as RH reduces daily swings that stress boards and finishes, so use a digital hygrometer and make seasonal adjustments when needed. The table below summarises practical targets for common constructions and explains expected EMC ranges.
| Flooring Type | Ideal RH Range | Typical EMC / Notes |
|---|---|---|
| Solid hardwood flooring | 35–55% RH | EMC ≈ 8–12%; greater seasonal movement; best where indoor climate is consistent |
| Engineered wood flooring | 30–55% RH | EMC ≈ 7–11%; cross‑laminated core limits across‑grain movement — good for kitchens and UFH |
| Laminate flooring | 30–60% RH | Low‑swelling core resists moisture, but seams and underlay still respond to subfloor vapour |
In short: engineered options often tolerate a slightly wider RH window than solid boards, which helps reduce visible movement when seasons change.
Recommended RH ranges for hardwood and engineered floors
Guidance differs by construction: engineered flooring typically performs well between 30–55% RH; solid hardwood usually prefers 35–55% RH to limit across‑grain swelling and shrinkage. If RH moves outside these bands, act: use a humidifier in prolonged winter dryness below ~35%, and use dehumidification or better ventilation when RH climbs above ~55% during damp spells. Keep a reliable hygrometer running and spot‑check board moisture with a moisture meter so your stock is within target MC before and during installation.
How does equilibrium moisture content (EMC) affect floor stability?
EMC is the moisture level wood reaches for a given RH and temperature, and it directly determines dimensional stability. If the installed wood’s moisture content (MC) is far from the EMC of the room, the boards will shrink or swell until they balance. Matching delivered wood MC to the expected indoor EMC (in the UK often about 8–11%) reduces initial movement and long‑term strain on joints and finishes. Practical measures — acclimating boards, testing the subfloor and taking moisture readings — make sure installed timber starts near EMC so expansion gaps and fixings can cope with the remaining movement without causing buckling or gapping.
Getting the wood and the room to the same EMC is the single best way to limit post‑installation surprises.
Drying timber — key principle
Timber’s residual moisture will tend to equilibrate with the ambient relative humidity. The conventional approach is to dry timber as quickly as the species, thickness and end‑use allow, while avoiding the creation of drying defects.
— Drying and control of moisture content and dimensional changes, 1999
How can you prevent warping and moisture damage? Practical moisture control
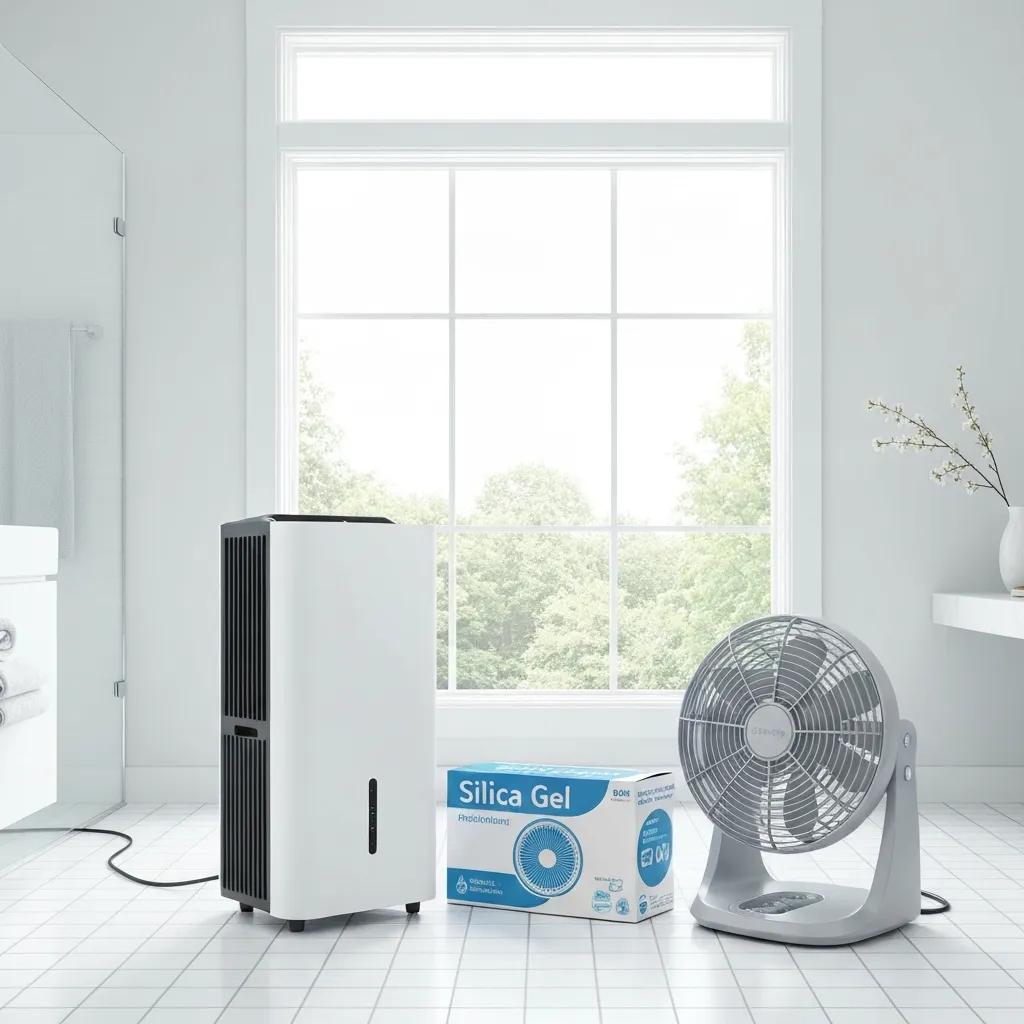
Preventing humidity damage is a combination of correct barriers, suitable underlays, environmental control and simple maintenance to keep RH stable and subfloor vapour under control. Key steps include installing appropriate damp‑proof membranes or vapour barriers over concrete, choosing underlays with compatible vapour resistance, managing RH with HVAC or portable devices, and adopting sensible cleaning and spill procedures. Regular checks with a hygrometer and moisture meter complement mechanical controls and let you intervene early. The table below helps match a barrier, underlay or device to the subfloor and use case.
| Product Category | Best Use Case | Pros / Cons / Suitability |
|---|---|---|
| Damp Proof Membrane (DPM) | Concrete subfloors before screed or overlay | Pros: effective vapour control; Cons: must be continuous and sealed; well suited to glued installations |
| Vapour barrier (foil tape + underlay) | Floating floors over timber or low‑moisture screed | Pros: easy to install; Cons: less effective with high subfloor moisture; suited to floating installations |
| Underlay (acoustic / thermal) | Floating or engineered installations | Pros: improves comfort and UFH compatibility; Cons: choose low vapour resistance products when using UFH |
| Dehumidifier | Whole‑room use when RH >55% | Pros: actively removes moisture; Cons: running cost and maintenance; useful during damp UK summers |
| Hygrometer / Moisture meter | Monitoring | Pros: inexpensive early warning; Cons: needs correct placement and interpretation |
Subfloor type and installation method determine the right barrier; combine those with ongoing monitoring for the best results.
- Key prevention steps every homeowner should follow:
- Confirm subfloor dryness before installation with moisture testing.
- Choose a barrier and underlay that suit your floor type and subfloor.
- Keep indoor RH in the target band using HVAC, humidifiers or dehumidifiers.
- Allow correct expansion gaps and follow acclimation guidance.
- Wipe up spills quickly and avoid wet‑mopping sealed wood.
Apply these steps consistently and you’ll prevent most humidity‑related problems. Below we explain how devices and systems support these routines.
If you’re sourcing products and services, you’ll find solid hardwood, engineered wood and laminate ranges, plus accessories such as moisture barriers, underlays, humidifiers, dehumidifiers and hygrometers. Match the accessories to the floor construction and room use, or get professional advice to ensure controls are compatible with your chosen product.
Why is correct installation vital for humidity management?
Good installation stops normal moisture cycles from becoming structural problems. Acclimation, correct expansion gaps and thorough subfloor prep set the baseline for safe movement. Acclimating boards brings their MC close to the room EMC, expansion gaps give seasonal growth somewhere to go, and levelling plus damp proofing keeps moisture out from beneath. Adhesive choice, fixing patterns and underlay compatibility all matter for long‑term performance, so match installation practice to floor type and environment. The following sections give practical timeframes and gap sizes you can use on site.
How long should boards acclimatise?
Acclimation brings the boards’ moisture content in line with the room’s EMC to cut down on post‑installation movement. Short deliveries may stabilise in 48 hours; solid hardwood commonly needs one to two weeks in stable conditions. Always check board MC with a moisture meter against your target EMC before fixing. During acclimation stack boards with spacers, keep heating or ventilation running to steady temperature and RH, and reject batches that sit outside acceptable MC ranges. Proper acclimation reduces the chance of winter gapping and damp cupping and makes expansion‑gap design more predictable.
How do expansion gaps and subfloor prep prevent damage?
Expansion gaps give boards room to move so swelling doesn’t force them into buckling. Recommended widths vary with board width and species but commonly total around 8–12 mm at the room perimeter, with larger gaps at long runs and fixed penetrations. Subfloor prep means checking flatness, confirming dryness within acceptable thresholds, installing an appropriate DPM or vapour barrier over concrete and using vapour tape at joints for continuity. A level, dry subfloor and correctly sized gaps let timber move freely without stressing joints or finishes, preventing buckling and seam splitting even through significant seasonal RH change.
Installers and DIYers can source vapour tape, DPM and other accessories from suppliers; using the right items makes achieving sealed subfloors and correct fixation straightforward and reliable.
How can you detect and repair humidity‑related floor damage?
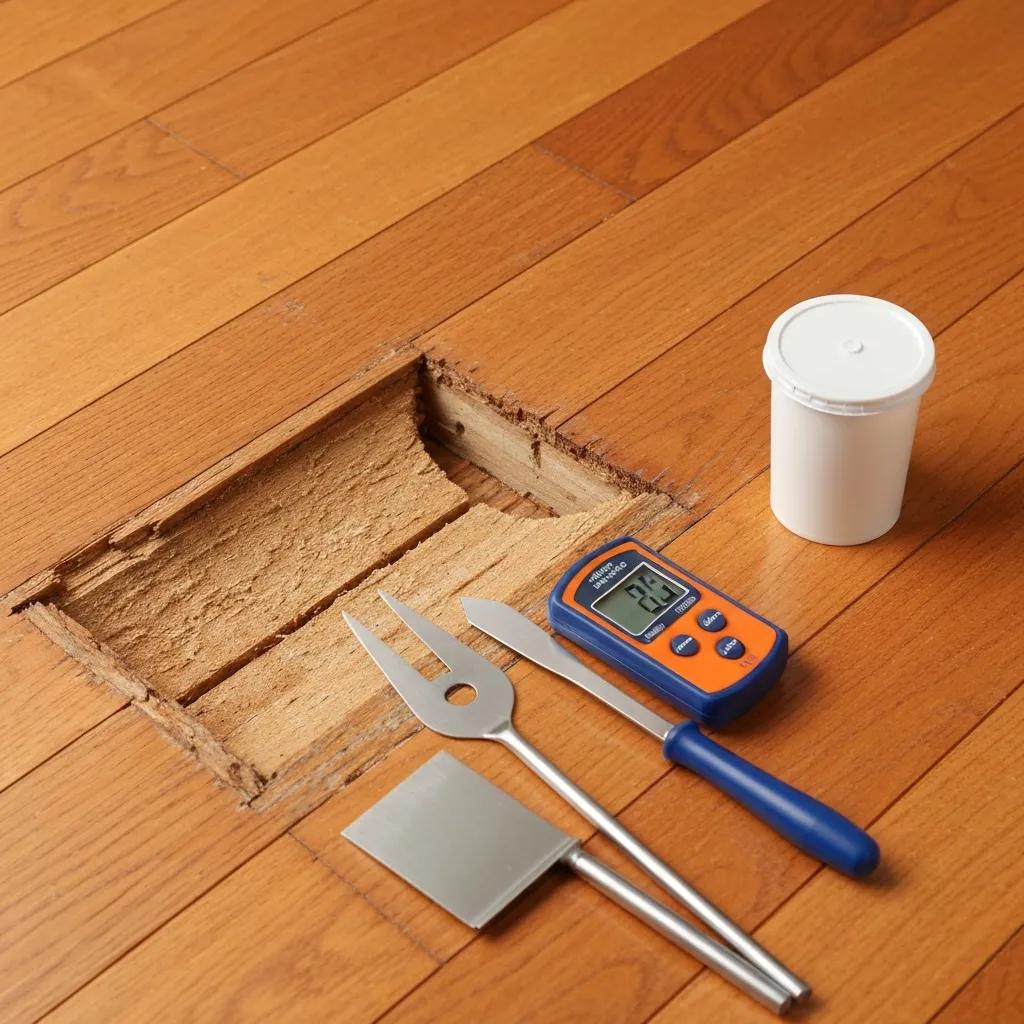
Early detection keeps repair work small and affordable. Look for small edge cupping, widening seams, lifted edges or finish blemishes — these often precede more serious problems. A practical diagnostic routine combines a visual check, hygrometer readings, targeted moisture meter checks in several spots and subfloor moisture testing where signs persist. DIY work can fix surface finish issues or replace isolated boards, but widespread cupping, repeated crowning after sanding or a wet subfloor usually needs professional diagnosis and remedial work. The table below is a quick triage to help you decide when to act and who to call.
| Damage Type | Early Signs | DIY Fix / Pro Action / Typical outcome |
|---|---|---|
| Cupping | Edges higher than centre; seams tight | Lower RH and monitor; minor cases may stabilise. Persistent cupping usually needs professional drying and possible board replacement |
| Crowning | Flattened cup with raised centre after sanding | Stop sanding and reduce moisture; pro drying and re‑sanding/refinishing may be required |
| Gapping | Wider seams in dry seasons | Use humidity controls and seasonal filling; where gaps exceed tolerance, refit or replace boards |
| Buckling | Boards lifting or separating | Emergency professional intervention; expect subfloor moisture remediation and reinstallation |
Use this triage to stabilise the room first, then choose DIY fixes for local, surface problems or professional restoration when the subfloor or structure is involved.
What early signs should you watch for?
Watch for subtle cupping at board edges, seams that widen in low RH periods, raised plank edges near thresholds or small blisters in the finish after spills. Monthly or seasonal inspections with a hygrometer plus spot moisture meter readings at representative points will show whether visual signs match elevated ambient or subfloor moisture. If readings exceed recommended thresholds, isolate the moisture source — leaks, spills or rising damp — and act quickly to dry and stabilise RH. Early detection lets you apply humidity control and modest repairs before issues become structural.
- Early monitoring checklist:
- Check hygrometer readings in key rooms every month.
- Visually inspect seams and edges for cupping or raised boards.
- Take spot moisture readings at multiple locations if you see signs.
- Log seasonal changes to spot patterns and track sources.
Following this checklist builds a simple maintenance habit that prevents small cosmetic problems turning into costly structural repairs.
When should you DIY and when call a professional?
Do basic DIY for surface or cosmetic issues — minor scratches, single board replacement, or seasonal gaps — provided the subfloor is dry and RH is controlled and you have the correct tools. Call a professional when cupping affects many boards, buckling is visible, subfloor moisture is elevated, or the root cause is unclear. Professionals offer full diagnostics, subfloor moisture remediation, drying and stabilising services and, if needed, replacement and refinishing — a sensible investment where the issue is widespread or recurrent.
Best flooring choices and care tips for the UK’s humid climate
Picking the right floor and care routine for the UK means matching species and construction to realistic humidity control and room use. Engineered wood usually gives better dimensional stability than solid hardwood because its cross‑laminated core limits across‑grain movement — a good choice for areas with variable humidity or where underfloor heating is used. Solid hardwood remains desirable for its longevity and ability to be re‑sanded many times, but it performs best in rooms where RH is well managed; species such as oak are popular because they balance stability and repairability. Below we compare solid and engineered options and then cover underfloor heating specifics.
Solid hardwood vs engineered — how do they compare?
Engineered flooring, with a plywood or HDF core, reduces across‑grain movement and so limits seasonal gaps and cupping — a pragmatic pick for kitchens, hallways and homes with variable UK humidity. Solid hardwood can be re‑sanded repeatedly and lasts for decades, but it shows greater across‑grain movement and therefore needs tighter RH control and larger expansion gaps. For higher moisture risk areas or where underfloor heating is present, choose engineered boards rated for UFH; for main living spaces where refinishing matters most, solid hardwood is a premium option when paired with good environmental control.
Engineered floors are generally more dimensionally stable in width because of their layered construction, making them more resilient to humidity swings than solid hardwood.
Research snapshot — engineered flooring and dimensional stability
Layer structure influences dimensional movement during heating and cooling cycles. Studies show laminated constructions tend to exhibit the lowest width swelling compared with other types, underscoring engineered flooring’s advantage in variable humidity conditions.
— Effect of the layer structure of wooden floorings on dimensional mobility, I. Kureli, 2020
- Choosing between solid and engineered:
- Pick engineered for better dimensional stability and UFH compatibility.
- Choose solid if you prioritise maximum refinishing potential and accept stricter RH control.
- Match species and board width to room use and the likely RH stability.
This approach helps you decide on stability, repairability and suitability for the room given typical UK humidity patterns.
Managing floors with underfloor heating in humid environments
Underfloor heating (UFH) adds thermal cycles that can amplify humidity effects, so control surface temperature and RH carefully. Keep surface temperatures within manufacturer limits (commonly under 27°C) and avoid rapid temperature rises which push moisture through the wood. Use UFH‑compatible underlays and adhesives with appropriate vapour characteristics, and monitor both floor surface temperature and RH during commissioning. Combine UFH with dehumidification in warm, damp periods to prevent high EMC and cupping; in cold, dry months a measured amount of humidification can reduce excessive shrinkage and gaps.
When buying, look for engineered boards and underlays explicitly rated for UFH — that makes achieving safe surface temperatures and stable EMC far more straightforward.
- UFH do’s and don’ts:
- Do stabilise RH before commissioning UFH and after installation.
- Do use UFH‑compatible underlays with suitable vapour characteristics.
- Don't heat up rapidly — ramp temperatures slowly during commissioning.
- Don't ignore ongoing RH monitoring when UFH is used in damp rooms.
These controls balance thermal comfort with moisture management so wood floors perform reliably with underfloor heating.
This guide has covered how moisture moves through wood, practical RH targets and EMC, prevention strategies including barriers and devices, installation best practice, detection and triage of damage, and choices for the UK climate and UFH. Put monitoring in place, pick compatible products and follow acclimation and gap rules — those steps will hugely reduce the risk from the invisible threat: humidity.


